Instances
In this article:
Instances#
General information#
K2 Cloud provides computing resources as instances. The Instances subsection is used to create virtual machines, change their parameters and advance settings, and display a list and details of all instances created under the project and VPC.
Each instance has several parameters:
ID — the unique instance identifier in K2 Cloud.
Status — the current status of the instance. An instance can have the following statuses:
stopped
error
crushed
failed
pending
running
terminated
shutting-down
Name tag is a tag with the Name key and a value set by a user. To learn more about tags, please see Tags section.
Type – the instance type.
Availability zone — the information on the data center in which physical hardware is located.
Subnet — the subnet in which the instance is located.
Created — the instance creation date.
SSH-key — the specific SSH-key assigned to an instance.
Elastic IP — the external IP address of the primary network interface of an instance.
Private IP — the private IP address of the primary network interface of an instance.
Placement group — the placement group that the instance belongs to.
Click the icon on the right to search bar to go to instance parameter display settings.
Billing#
An hourly fee is charged for each instance. This rate consists of:
CPU generation;
vCPU count;
RAM size;
type of OS installed: commercial (proprietary) or free, including free licensed ones;
guaranteed CPU availability: 20%, 50% or 100%. 1
- 1
The above values of 20% and 50% apply to Shared Core family instances.
Additionally, the price of instances in the GPU Accelerated Computing family also depends on the type and number of graphics cards. Fixed monthly payment is also available. Placing long-term (3, 6, 12 months or more) orders for this family instances is eligible for a discount.
Available quotas#
The following default quotas are allocated to instances:
50 instances in each availability zone in a project;
4 simultaneously running instance export tasks for each user;
3000 GiB total RAM in a project;
3000 vCPU cores in a project.
If necessary, you can increase quotas. To do this, contact the support service via the support portal or by email support@k2.cloud.
Instance types#
K2 Cloud offers users a wide variety of instance types with different combinations of computing resources and memory sizes.
Instance families#
All instance types are grouped and ordered by family. You can select types from the following families: General Purpose for common computational tasks, HPC optimized for resource-intensive applications, GPU Accelerated Computing for ML, AI and LLM tasks, and Shared Core with a guaranteed vCPU availability of less than 100%.
For all instances except for the Shared Core family, 100% resource availability is guaranteed. Several instances of the Shared Core family share a single physical core, with each instance guaranteed a certain percentage of processor time: minimum 50% or 20%, depending on the instance type. It helps reduce costs for services and tasks for which full processor availability is not required. If resources are free, a specific instance can be allocated up to 100% processor time.
The table provides recommendations on instance types for various tasks.
Family |
Description |
Application |
|---|---|---|
General Purpose |
These instances are suitable for wide range of tasks. They offer an optimal ratio of computing power and memory size. |
|
HPC Optimized |
These instances deliver ultra-high performance for compute-intensive workloads. These instances are based on 2nd Generation Intel® Xeon® Scalable Processors with the Cascade Lake architecture. |
|
GPU Accelerated Computing 2 |
Instances with NVidia GPUs for ML, AI, and LLM tasks. |
|
Shared Core |
Instance with a guaranteed processor time availability of 50% and 20%. This is for services and tasks for which full processor availability is not required. |
|
- 2
GPU Accelerated Computing instance family is available on request. In an e-mail to your manager or support service support@k2.cloud, specify the desired instance type parameters: model and number of graphic cards, number of vCPUs, and RAM size.
- 3
If you need out-of-the-box tools to create, train, and use machine and deep learning models, you can use K2 Neurotech-provided services.
CPU generations#
K2 Cloud instances are powered by Intel® and AMD® CPUs. Hardware characteristics for each generation are shown in the table.
Important
In the ru-spb region, only instances powered by gen5 and gen7 CPUs are available.
Generation 4 |
CPU |
Architecture |
Characteristics |
|---|---|---|---|
gen5 |
Intel® Xeon® Gold 6254 |
Cascade Lake |
Max Turbo Frequency 4.00 GHz |
gen5p |
Intel® Xeon® Gold 6244 |
Cascade Lake |
Max Turbo Frequency 4.40 GHz |
gen7 |
Intel® Xeon® Gold 6548y+ |
Emerald Rapids |
Max Turbo Frequency 4.10 GHz |
gen7p |
AMD® EPYC® 9275F |
Zen 5 |
Max Turbo Frequency 4.80 GHz |
- 4
Gen3 (Intel® Xeon® Gold 6140) and gen4 (Intel® Xeon® Platinum 8168) processors are gradually being phased out.
All our servers have the Turbo Boost option enabled. This allows instances to get the most out of the CPU and run at the maximum CPU frequency. Hypervisor does not allow passing this information to an instance. Therefore, if you try to check CPU frequency using OS tools from within the instance, you will see the base CPU frequency.
Graphic cards#
For GPU Accelerated Computing instances, the following graphic cards are available:
Card * |
Architecture |
GPU Memory |
GPU Bandwidth |
|---|---|---|---|
NVIDIA H100 Tensor Core GPU |
Hopper |
80 GB |
2 TB/s |
NVIDIA L40S GPU |
Ada Lovelace |
48 GB |
864 GB/s |
NVIDIA A100 Tensor Core GPU |
Ampere |
80 GB |
1.935 GB/s |
NVIDIA T4 Tensor Core GPU |
Turing |
16 GB |
300 GB/s |
- *
For different graphic cards, please inquire your manager regarding their availability.
Instance types with multiple graphic cards can be added to the GPU Accelerated Computing family upon request. Each particular instance type can only have graphic cards of the same type.
Creating an instance#
You can launch an instance using one of the following methods:
Create an instance using the wizard#
To launch the instance wizard, go to the section Virtual machines Compute Instance and click Create.
Step 1. Select an image#
When starting an instance, you need to select a pre-created image with the OS you want to use, for example, Windows, Debian or Ubuntu.
In the side menu, you can select such pre-created images from the following groups:
K2 Cloud images — images with pre-installed system software, which are provided by K2 Cloud.
Partner images — images with pre-installed system software, which are provided by our partners.
Own images — images created in the current project.
Available images — own images and images created in other projects and accessible from the current project.
Note
Own and available images can also include images created during the backup process. To display them, enable Show recovery points. However, we recommend creating an instance from a recovery point directly, in which case you won’t need to specify its parameters again.
To quickly find an image, you can search by ID or description. Select a pre-built image and click Select to confirm the choice and go to the next step.
Note
If the desired image is absent, click Create new image. You will be automatically switched to Images subsection. Create here the desired image according to the instruction. You will have to start the instance creation procedure all over again, so it is better to create the image in advance.
Step 2. Select an instance placement#
На этом шаге необходимо выбрать, где в облаке будет размещаться экземпляр, и настроить тег Name для создаваемого экземпляра.
Тег Name — по умолчанию в качестве значения тега задаётся имя образа, из которого создаётся экземпляр. Вы можете сохранить изначальное значение тега, изменить или удалить его.
Availability zone — If a region has multiple availability zones, you can select a zone where the instance will be created.
Placement group — When you select a placement group, its member instances will be launched on different computing nodes. This helps minimize the number of failed instances if one of the physical nodes fails. To use the placement group, create it first. For more information, see the documentation on placement groups.
Important
Placement groups are not supported for instances of the Shared Core family.
Placement type — If the default value (
Shared server) is selected, instances will be started on a shared computing node where instances of other users can be deployed. To launch an instance on a dedicated host, order it first. More information about starting an instance on a dedicated host can be read in the respective section of the documentation.Number of instances — The number of instances to be created (
1by default).
Step 3. Select an instance type#
All instance types are grouped into families. Select the desired family in the side menu.
Note
If you are not sure which instance type is best for your workload, start with the General Purpose instance family. In K2 Cloud, you can change instance type if necessary. For optimal performance, we recommend using the instance types of the current generation gen7 .
To quickly find the required instance type, you can search by instance type, CPU generation, vCPU count, RAM size and GPU type. Select a predefined instance type from the list according to your needs and click Select.
Note
For Windows, we recommend choosing instance types with at least 4,096 MB RAM.
Step 4. Set the network parameters#
In this step, select the VPC and set the parameters of the network interfaces that will be attached to the instance.
Note
For information, the system displays the details of the availability zone selected in step 2.
VPC — VPC where the instance will be created. To create the instance in a new VPC, click Create VPC and subnet and set the required VPC and subnet parameters.
Note
If the instance is to be attached to a virtual switch, select
Non-VPC.
A network interface allows you to connect an instance to a subnet or switch. By default, a new instance will have a network interface with 0 index. This primary network interface cannot be detached from the instance.
In the Network interface 0 block, set the following parameters:
Note
To display the block, click Expand all. To hide it, click Collapse all.
Network interface — You can select an existing interface from the list of available interfaces or keep the field intact. A new interface will be created then.
Note
The existing interface will not be deleted together with the instance.
Network — (For a new interface only) Select the subnet or switch, which the network interface will be attached to. If you need to attach the interface to a new subnet, click Create subnet and specify the subnet parameters.
For the new interface, you can specify a description, internal IP address and security group instead of using automatically assigned values. To do this, click Advanced and fill in the required fields.
Note
Internal IP address, Elastic IP address and security groups can only be associated with a network interface attached to a subnet.
Description — The brief description of the interface, for example, which instance it is attached to.
Private IP — The internal IP address of the primary interface at which the instance will be accessible. If the field is left empty, it will be assigned automatically.
Security groups — You can select up to five security groups. If the field is left blank, a default group from the selected VPC will be associated with the instance.
Delete with instance — This option specifies whether to delete the network interface along with the instance (enabled by default).
Associate with existing Elastic IP — When enabled, an available public IP address will be associated with the network interface. The option is available only if the VPC has an attached Internet gateway. The default value (enabled or disabled) depends on the subnet selected in the Network field. If Elastic IP auto-association is enabled for the subnet, this option is also enabled; otherwise, it is disabled.
If there is only one available Elastic IP, the Associate Elastic IP checkbox is displayed together with the address ID and the address itself. If there are no available addresses, the Allocate Elastic IP checkbox is displayed. When selecting it, specify the address pool (default pool, user pool or DDoS-protected pool) from which the Elastic IP will be allocated, and (optional) set the Name tag for the address. The address will be allocated automatically when proceeding to another step.
In this step, you can create and attach additional network interfaces to the instance. To do this, click Add device.
You can attach max. 16 network interfaces to an instance. For more information on network interfaces, see Network Interfaces.
To go to the next step, click Next.
Step 5. Select volumes#
In this step, set parameters of the volumes that will be created with the instance.
In the Boot volume block, specify the boot volume configuration:
Parameter |
Description |
|---|---|
Snapshot |
A snapshot from which you are going to create an instance (by default, snapshots that belong to the selected images are shown). |
Size |
Volume size in GiB (1 GiB = 1,024 MiB = 230 byte). |
Volume type |
Sets the desired volume type. For more information on volume features and parameters see page Volumes. |
IOPS |
The maximum total number of I/O operations per second. For volumes types gp2, st2 and st3 the number of IOPS is calculated automatically, for the volume type io2 you can specify the required number of IOPS. |
MiB/s |
The maximum total throughput, in MiB/s, at which data can be read from or written to a volume. It is calculated automatically. |
Delete with instance |
Specifies whether the volume must be automatically deleted after the instance is deleted. |
A boot volume cannot be detached from an instance.
To add another volume, click Add volume and specify the required parameters. You can attach up to 16 volumes to instances with the hvm virtualization type, and up to 4 volumes to instances with the hvm-legacy virtualization type.
Once you have added all the required volumes, click Next.
Step 6. Set additional parameters#
На этом шаге вы можете добавить SSH-ключ, задать имя пользователя и пароль для доступа к VNC-консоли, выбрать тип виртуализации, ввести пользовательские данные и назначить теги экземпляру и дискам, которые будут созданы вместе с экземпляром.
Important
Логин и пароль доступа можно задать только для экземпляра Linux, на котором установлен агент EC2 (см. инструкцию по установке). Кроме того, экземпляр должен быть подключён хотя бы к одной подсети.
SSH key — The SSH key is used to authenticate the user when accessing the instance. The public part of the key must be first uploaded to the cloud. You can add the key after the instance has been launched as well.
Имя пользователя — Имя пользователя для доступа к VNC-консоли. Его можно использовать также для доступа по SSH. Имя должно начинаться с латинской буквы или
_, содержать строчные латинские буквы, цифры,-и_и иметь длину от 1 до 32 символов. Заданное имя нельзя изменить.Пароль — Пароль пользователя для доступа к VNC-консоли (он должен соответствовать требованиям к сложности пароля).
Virtualization type — You can choose from the two virtualization types. The
hvmvirtualization supports VirtIO drivers and optimizes the performance of the instance OS (which must support VirtIO drivers). All K2 Cloud images are compatible with this virtualization type.The
hvm-legacyvirtualization without VirtIO support ensures correct operation of an instance whose operating system does not support VirtIO drivers.User data — This data describes the operations to be performed automatically at the instance launch. For details, see the Instance Metadata API documentation section.
Delete on shutdown — Specifies whether the instance should automatically be terminated after the shutdown. The option is unchecked by default.
Enable RAM monitoring – Checking this option enables RAM monitoring. RAM monitoring is available for Linux instances only. In addition to enabling the monitoring, CloudWatch agent must be installed on such instances (for details, see). By default the checkbox is cleared.
На этом шаге вы можете задать теги экземпляру и/или дискам.
Если тег Name не был задан на шаге 2 и вы хотите его добавить, нажмите Добавить тег Name и задайте значение тега. Чтобы добавить произвольный тег, нажмите Добавить тег и задайте ключ и значение тега.
Если тег нужно также назначить присоединённым дискам, установите флаг Назначить дискам.
To assign additional tags, click Add tag. After setting all parameters, click View and launch.
Step 7. Review the parameters#
In the Review step, check your instance parameters and click Launch.
Instance launch takes some time. Upon completion of the instance launch process, its status will change from Pending to Running. Each created instance is assigned a unique ID in the i-xxxxxx format.
Many instance parameters can be changed without stopping the instance. Click a link with unique ID to go to the instance’s page in order to make changes, attach or detach additional volumes, reboot or shut down an instance, change public address, etc.
Create an instance from a launch template#
If you need to launch instances with the same parameters from time to time, use launch template to quickly launch an instance from a saved configuration. You can also create instances with differing parameters, using template versions.
Go to the Virtual machines section Compute Instances.
To the right of the Create button, select Create instance from launch template in the drop-down menu.
In the window that opens, select the launch template and its version. If you selected the Security groups option when creating the template, specify the subnet to which the primary network interface will be attached.
You can also modify the following parameters, if necessary:
placement group;
placement type — shared or dedicated host; for a dedicated host, you can also specify:
auto-placement or particular dedicated host;
instance affinity to the dedicated host.
number of instances to be created;
the Name tag (to enable the input field, select the Assign tag to instance or Assign tag to volumes checkbox);
option to assign the Name tag to an instance;
option to assign the Name tag to volumes;
RAM monitoring option.
Note
RAM monitoring is only available for Linux instances with CloudWatch agent installed (for details, see).
For information, the system displays the ID and name of the VPC where the respective network resources are placed.
Once the parameters are set, click Overview and Launch and check the instance configuration.
To create an instance, click Launch.
You can also create an instance from a template in the Launch Templates section.
Create an instance from another instance#
You can create a required number of instances with the same parameters as an existing instance has.
Go to the Virtual machines section Compute Instances.
In the instance table, select an instance with the required parameters to be used as a reference configuration.
To the right of the Create button, select Create an additional instance in the drop-down menu.
In the window that opens, specify the number of instances you want to create. To enable RAM monitoring, tick the RAM Monitoring checkbox.
Note
RAM monitoring is only available for Linux instances with CloudWatch agent installed (for details, see).
You can also change the Name tag, enable the Terminate on instance shutdown option to delete the instance after it is stopped, and add user data.
Note
The Name tag will be assigned to the newly created instance only. If other tags were assigned to the original instance, they will be ignored.
Once the parameters are set, click Overview and Launch and check the instance configuration.
Click Launch.
Deleting an instance#
Attention
Before deleting an instance, make sure you do not lose any important data. If you need to save a volume copy for future use in K2 Cloud, you can create a snapshot of a volume. If you need a volume or instance copy to boot from and run in your local infrastructure, use the export function.
Go to the Virtual machines section Compute Instances.
In the resource table, select the instance and click Delete.
In the dialog window, confirm the action.
Note
Volumes and network interfaces for which the Delete with instance checkbox is checked, as well as all instance tags, will be deleted along with the instance.
Connecting to an instance#
Getting the console output#
To view the current state of the instance launch process or to get the password:
Go to the Virtual machines section Compute Instances.
Find the instance in the resource table and click the instance ID to go to its page.
In the Information tab, click View output.
Accessing the remote console#
In K2 Cloud, you can connect to an instance using a remote console no matter what the state the network is in and whether a public IP address is associated with the instance. To open the console to manage instance remotely:
Go to the Virtual machines section Compute Instances.
Find the instance in the resource table and click the instance ID to go to its page.
In the Information tab, click Open console.
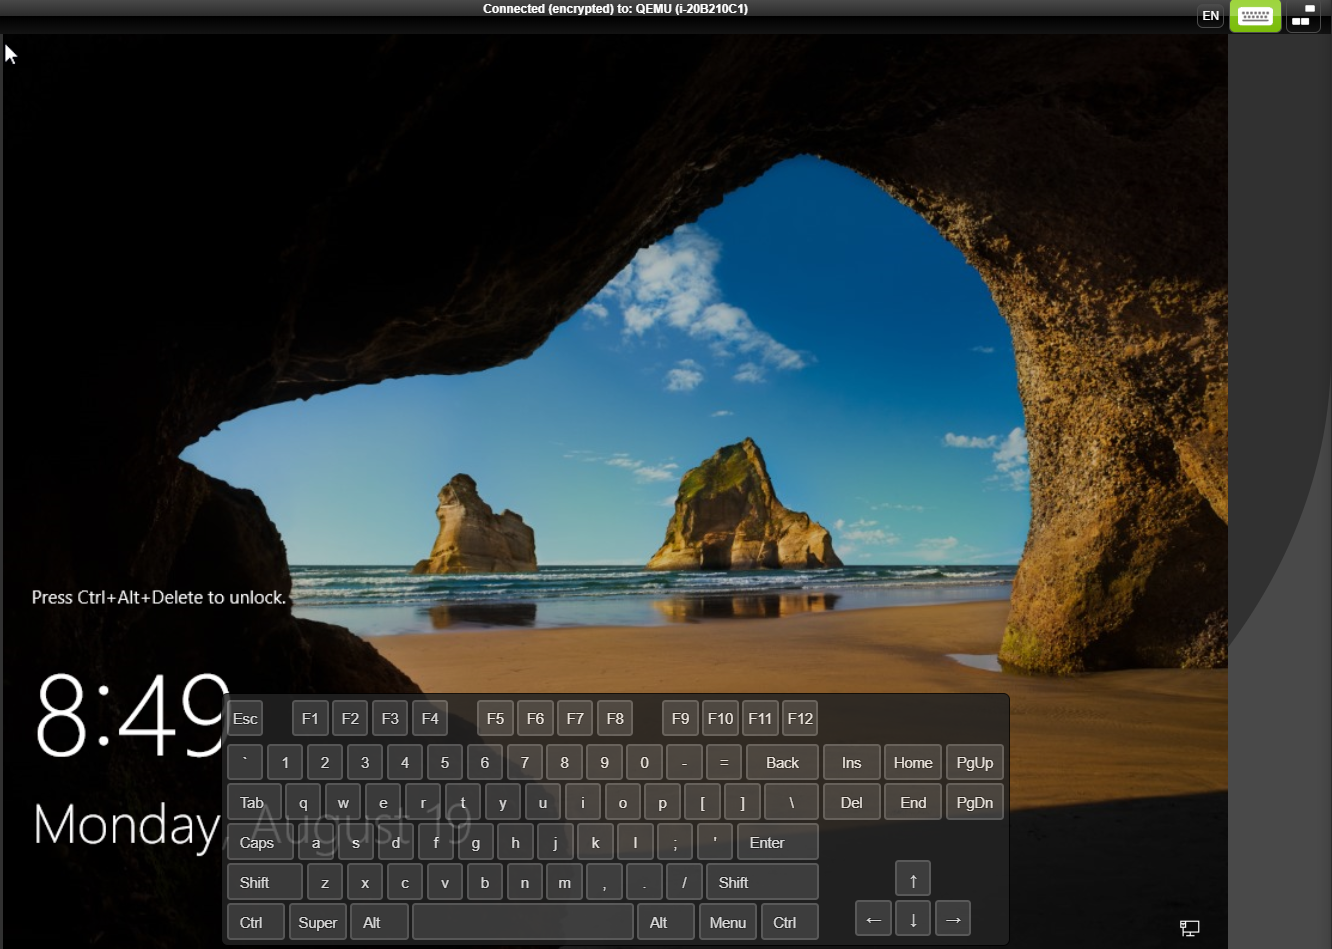
There are the following additional buttons in the top right corner of the management console for user convenience:
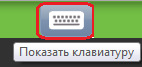 — click this button to open virtual keyboard.
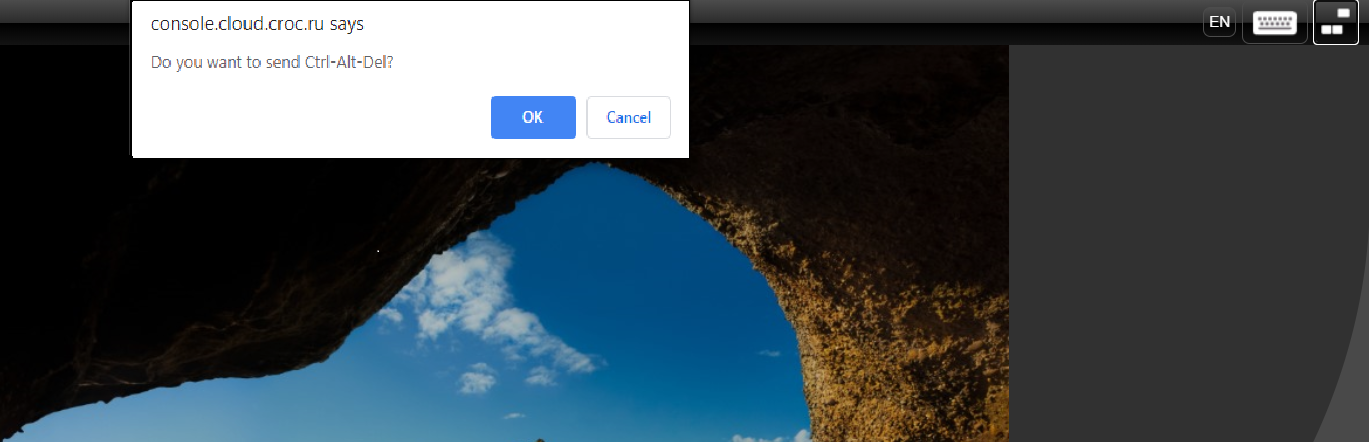
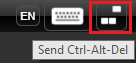 — clicking this button has the same effect as pressing Ctrl + Alt + Delete on a keyboard.
Enabling access to the remote console#
You can grant any K2 Cloud user with a remote access to the instance.
Go to the Virtual machines section Compute Instances.
Find the instance in the resource table and click the instance ID to go to its page.
In the Information tab, click :Share.
In the window that opens, set the following parameters:
email – recipient’s email address;
duration – period for which access is granted.
After setting all the required parameters, click Share.
A link to access the remote console will be sent to the specified email.
Important
Access to the remote console can only be granted to the users that have user account in cloud.
Other methods#
You can read about other ways to connect to an instance in Instructions section of documentation.
Actions on instances#
Rebooting an instance#
Rebooting an instance is equivalent to rebooting an OS. In most cases, rebooting an instance takes only a few minutes. To reboot the instance, while gracefully stopping all services:
Go to the Virtual machines section Compute Instances.
Select the instance in resource table.
Click Reboot.
Confirm the reboot of the instance.
Activating hibernation#
Important
We do not guarantee that an instance without a proper preconfiguration will enter the hibernation mode after clicking the Hibernate button.
Hibernation is a state in which the memory content of an instance, applications, and processes is saved to the local volume of the instance before it enters the stopped state. It differs from stopping an instance as follows:
To hibernate an instance, its operating system must be correctly configured;
In the hibernation mode, instances save memory and application states that they had when hibernation was initiated;
Hibernation can be used for instance pre-warming if the instance or application takes a long time to boot.
When you hibernate a correctly configured instance, K2 Cloud signals the OS to perform hibernation. To start hibernation, the guest OS uses an installed QEMU Guest Agent. The cloud communicates with the agent and sends it the appropriate command, where thereafter QEMU Guest Agent prompts the OS to enter the hibernation mode. In this mode, the OS saves the memory content of the instance to a volume.
Important
Please note that the volume size must be larger than the RAM size of the instance.
Attention
We do not recommend resizing the volume or changing the type of hibernated instance. Otherwise, the OS will boot normally, and the saved VM memory state will be ignored.
When you start this instance again, it will enter the Pending state, the memory content will be downloaded from the volume, and the states of processes and applications will be restored.
How fast an instant enters/exits the hibernation mode depends on the volume performance. To accelerate the process, you can use higher-performance volume types, such as gp2: Universal (SSD) and io2: Maximum (SSD).
Using hibernation mode reduces your cloud cost during instance suspension periods since the payment is only charged for storing its volumes and Elastic IP.
To hibernate an instance:
Go to the Virtual machines section Compute Instances.
Select the instance in resource table.
Click Hibernate.
Confirm the instance hibernation.
Stopping an instance#
Go to the Virtual machines section Compute Instances.
Select the instance in resource table.
Click Stop.
Confirm stopping the instance.
Important
If the operating system of the instance does not shutdown within a few minutes, do a forced shutdown (it is similar to turning off the server’s power). To do this, click Stop (force).
Some instance parameters can only be changed when it is stopped.
Creating an image#
An image can be created from both a stopped and a running instance. To create an instance image that can later be used to create new instances with the same parameters:
Go to the Virtual machines section Compute Instances.
In the resource table, select the instance and click Create image.
In the window that opens, enter the image name and description.
If you need to assign tags to the image, proceed to the next step by clicking Add tags. To set the Name tag, click Add Name tag and enter the tag value. To set a custom tag, click Add tag and enter the tag key and value.
Note
For the tags to be assigned to the volume snapshots created with the image, tick the Assign to snapshots checkbox for the desired tags.
After setting all the required parameters, click Create.
An Image is created in two steps. First, snapshots of all attached volumes are taken simultaneously. This takes a fraction of a second and does not block the running instance.
In the second step, snapshots are written in parallel to object storage. The duration of this stage depends on the maximum amount of data on the volumes and may take a long time. All this time, the image will be in the pending status.
The instance can be restarted, stopped or even deleted without waiting for the second image creation stage to complete. But you can create another image from the instance only after the image creation process is complete and the image status changes to Available. The current image status can, for example, be viewed on its page.
You can find the image you have made Virtual machines Storage Images.
Exporting an instance#
Important
This action is available only for an instance in the Stopped status.
Important
You need to create a bucket in the Object storage section before exporting an instance.
To export an instance in a bucket:
Go to the Virtual machines section Compute Instances.
In the resource table, select the instance and click Export.
In the window that opens, set the following parameters:
prefix;
export format;
description;
bucket in which the instance will be exported.
Select the appropriate option and enter your email address if you want to be notified when the import process is complete.
After setting all the required parameters, click Export.
Instance export will take some time. Afterwards, the instance image will appear in Object storage. See details on the Import/Export documentation page .
Attach an instance to the Auto Scaling group#
You can attach one or more instances to an existing Auto Scaling group.
Changing instance parameters#
After the instance starts successfully, you can make changes to it. Below are some parameters you can change to suit your needs.
Note
Right-clicking on the selected instance in the table opens the context menu for instance management.
Changing the instance type#
Important
This action is available only for an instance in the Stopped status.
You can change the instance type if it does not suite your workload, it. To do this, go to the instance page, navigate to the Information tab, and edit the Instance type field.
All instance types are grouped and ordered by family. You can choose the desired combination of computing power and memory size and optimize your instance for specific tasks or business needs.
Associate/disassociate an Elastic IP address with/from an instance#
Important
An Elastic IP can be associated with the instance only if the primary interface was created in a subnet and if the VPC has an attached internet gateway.
To associate an instance with a public address from the list of allocated IP addresses:
Go to the Virtual machines section Compute Instances.
Select the instance in resource table.
Click Associate Elastic IP.
You can also associate an Elastic IP on the instance page. The address will be associated with the instance primary interface.
Note
Once the Elastic IP is associated, the network interface becomes available at the specified address within a minute.
To disassociate a public IP address from the primary interface of an instance and make the address available for use:
Go to the Virtual machines section Compute Instances.
Select the instance in resource table.
Click Disassociate Elastic IP.
Confirm the disassociation of the Elastic IP from the network interface.
You can also disassociate the associated Elastic IP from the instance primary interface on the instance page `.
To assign a different Elastic IP to an instance, first release the assigned IP address from the primary interface.
How to associate/disassociate an Elastic IP with/from an arbitrary instance interface, is described below.
Changing the SSH key#
Important
This operation adds a new key each time a key is changed but old key is not removed. Reboot an instance for changes to take effect.
To assign a new SSH key to an instance:
Go to the Virtual machines section Compute Instances.
Find the instance in the resource table and click the instance ID to go to its page.
In the Information tab, edit the SSH key field.
Настроить пароль#
Important
Чтобы настроить пароль, на экземпляре необходимо установить и сконфигурировать агент EC2 в соответствии с инструкцией.
Чтобы изменить или удалить пароль для доступа к VNC-консоли:
Go to the Virtual machines section Compute Instances.
Выберите экземпляр в таблице ресурсов и нажмите Настроить пароль. Если эта кнопка не отображается, то откройте меню дополнительных действий (Ещё).
В открывшемся окне для изменения пароля введите новый пароль в поле Пароль или нажмите Сгенерировать пароль и затем Сохранить. Чтобы удалить пароль, нажмите Удалить пароль.
Пароль можно также настроить на странице экземпляра. Для этого перейдите на вкладку Информация и нажмите Настроить пароль.
Changing user data#
To change the instance’s user data after creation:
Go to the Virtual machines section Compute Instances.
Find the instance in the resource table and click the instance ID to go to its page.
Edit the User data field in the Information tab.
For details, go to the Instance Metadata API documentation section.
Attaching/detaching network interfaces#
Instances connect to subnets/switches via network interfaces. You can manage interfaces in the subsection Network Interfaces or via API.
To attach a network interface to an instance:
Go to the Virtual machines section Compute Instances.
Select the instance in resource table.
Click Attach network interface.
Alternatively, go to the instance page, open the Information or Network and security tab, and click Attach network interface. An interface can be attached to only one instance at a time.
The following restrictions apply to attaching network interfaces:
multiple interfaces may not be attached to the same instance if they belong to the same subnet or switch;
if the primary network interface of an instance is a virtual switch network interface, then a subnet interface may not be attached to the instance;
up to 16 network interfaces (including a primary interface) may be attached to an instance;
attached interfaces should be in the same availability zone and belong to the same VPC as the instance itself.
To ensure proper operation of the attached interfaces, we recommend performing a minimum configuration of the interfaces or using K2 Cloud images. In these images interfaces are configured automatically. Please see Configure the attached interfaces.
To detach a network interface from an instance:
Go to the Virtual machines section Compute Instances.
Select the instance in resource table.
Click Detach network interface.
Configure hot attachment/detachment of network interfaces#
Interfaces can be attached to/detached from both stopped and running instances. All official K2 Cloud images support hot attachment/detachment of interfaces.
The list of Linux distributions that we have tested to support “hot” attachment/detachment of network interfaces:
CentOS/RHEL/OEL 6/7
Ubuntu ≥ 12.04
Debian ≥ 7
Fedora ≥ 19
If you use CentOS/RHEL/OEL 5.x or Ubuntu 10.x, please download the acpiphp kernel module and add it to the autoload.
This functionality is not guaranteed for instances launched from other images.
If you use other Linux distributions, then make sure the kernel is compiled with HOTPLUG_PCI_ACPI support:
[root@host ~]# grep 'CONFIG_HOTPLUG_PCI_ACPI=' /boot/config-`uname -r`
CONFIG_HOTPLUG_PCI_ACPI=y
If the command output is CONFIG_HOTPLUG_PCI_ACPI=y, it means that “hot” attachment/detachment of network interfaces are supported by this operating system “out of box”.
If the result of the command CONFIG_HOTPLUG_PCI_ACPI = m, then hot attach/detach of network interfaces requires downloading acpiphp or pci_hotplug module, depending on OS.
If the command output is a blank line, then the kernel does not support “hot” attachment/detachment of network interfaces.
Attention
If you detach a network interface from an instance and the instance does not support “hot” attachment/detachment of PCI devices at the OS level, the interface will remain in the Detaching internal state until the instance is stopped.
The cloud will return an error to subsequent attempts of hot attachment/detachment of this network interface.
Change the primary network interface#
Important
You can change the network interface only if the instance is stopped.
If you need to move an instance to another subnet or VPC, or from non-VPC to VPC, change the primary network interface of the instance. To do this, you need to have an unattached network interface in the target subnet or VPC. If there is no such interface, create it first. If necessary, assign the new interface an internal IP address of your choice from the target network.
The network interface to be used instead of the primary one should be:
in the same availability zone as the source one;
created in a subnet;
not attached to any instance.
Note
If you are going to move an instance to another VPC, it should not have any other interfaces in the subnet other than the primary one.
To change a primary network interface:
Go to the Virtual machines section Compute Instances.
Select an instance from the table and click Change primary network interface. If this button is not shown, open the additional action menu (More). Alternatively, you can go to the instance page and open Information or Network and Security tab.
In the window that opens, select the required interface from the list.
Click Change to confirm the change of the primary interface.
Note
Primary interface replacement does not include the transfer of its assigned Elastic IP. If you want the instance to inherit the old Elastic IP, then first disassociate it from the old primary interface and then manually assign it to the new one.
Associate/disassociate an Elastic IP address to/from the network interface#
Important
An Elastic IP can be associated only if the network interface was created in a subnet and if the VPC has an attached internet gateway.
To associate a public IP address with any instance interface:
Go to the Virtual machines section Compute Instances.
Find the instance in the resource table and click the instance ID to go to its page.
On the Network and security tab, select the desired interface from the list and click Associate Elastic IP.
In the window that opens, select the desired IP and press Associate.
Note
Once the Elastic IP is associated, the network interface becomes available at the specified address within a minute.
To disassociate the associated public IP address from any instance interface:
Go to the Virtual machines section Compute Instances.
Find the instance in the resource table and click the instance ID to go to its page.
On the Network and security tab, select the required interface from the list and click Associate Elastic IP.
Confirm the Elastic IP disassociation from the interface.
To assign a different Elastic IP to a network interface, first release the associated IP address from the interface.
Enable/disable RAM monitoring#
RAM monitoring is only available for Linux instances with CloudWatch agent installed (for details, see).
To enable/disable RAM monitoring:
Go to the Virtual machines section Compute Instances.
Find the instance in the resource table and click the instance ID to go to its page.
Move the RAM monitoring switch to the desired position in the Information tab.
Changing security groups#
Important
This action is allowed only for the network interface created in a subnet.
To modify the list of security groups assigned to a network interface:
Go to the Virtual machines section Compute Instances.
Find the instance in the resource table and click the instance ID to go to its page.
On the Network and security tab, select the required interface from the list and click Change security groups.
In the window that opens, remove the unnecessary security groups, select the required groups from the list, and click Change.
Note
If source/destination check (source-dest-check) is disabled on the selected interface and at least one of the added security groups is a source in the inbound rules of this or any other group, then you cannot associate such security groups with the network interface.
Change placement group#
Important
This action is available only for an instance in the Stopped status.
To move an instance into another placement group:
Go to the Virtual machines section Compute Instances.
Select the instance in the resource table and click Change placement.
In the window that opens, select the placement group and press :bdg-primary`Change`.
Alternatively, you can go to the instance page and then to the Information tab, and edit the Placement Group field.
Operations with volumes#
The Volumes tab contains a list of all volumes attached to the instance. Each volume has a set of parameters:
ID — the unique volume ID.
State — the information on the volume status.
Volumes – the sequential number of the volume in this instance.
Size — the maximum amount of data that a volume can hold.
Name tag — a tag with the Name key and a value set by the user.
Volume type.
IOPS — the volume performance (IOPS).
To view volume details in the Volumes subsection, go to the instance page and click the link with its unique ID in the Volumes tab.
Attaching/detaching a volume#
Attach a volume#
Important
A volume can be attached to an instance if they are in the same availability zone.
Only volumes with Available status (which aren’t attached to any instance) can be attached to an instance.
To attach one more volume to an instance:
Go to the Virtual machines section Instances.
In the resource table, find the instance to which you need to attach a volume and click the instance ID to go to its page.
Open the Volumes tab and click Attach.
In the window that opens, select the desired volume from the list.
If there are no available volumes or their characteristics do not match your needs, you can create a volume with the required parameters right in the volume attachment dialog box.
Click Create volume.
Enter Name tag (optional).
Select the volume size.
Select the volume type.
Set IOPS (only for io2 volumes).
Confirm the action by clicking Attach (for the existing volume) or Create and attach (for the newly created volume).
Detach a volume#
Important
You can detach only non-boot volumes from the instance.
To detach a volume from an instance:
Go to the Virtual machines section Instances.
In the resource table, find the instance from which you need to detach a volume and click the instance ID to go to its page.
Open the Volumes tab, select the volume to be detached and click Detach.
Confirm the volume detachment from the instance.
Changing the boot device#
Important
You can only change the boot device when the instance is in the Stopped status.
To change the boot device:
Go to the Virtual machines section Compute Instances.
Find the instance in the resource table and click the instance ID to go to its page.
Edit the Boot device field in the Information tab.
You can select a boot volume (disk1) or a boot menu (menu) as the boot device. If the image from which the instance was created supports CD-ROM, you can also select CD-ROM (cd-rom).
Changing the boot volume#
Before changing the boot volume, you should first attach the volume you want to use as a boot one.
Important
You can only change the boot volume when the instance is in the Stopped status.
Go to the Virtual machines section Compute Instances.
Find the instance in the resource table and click the instance ID to go to its page.
In the Volumes tab, select a volume that you want to make a boot volume.
Click Set as boot device.
Confirm the action.
Creating a snapshot#
You can create a snapshot of a volume attached to an instance at any time. To take a volume snapshot and then use it as an image for new volumes or data backups:
Note
For regular data backups, we recommend using Backup service.
Go to the Virtual machines section Compute Instances.
Find the instance in the resource table and click the instance ID to go to its page.
In the Volumes tab, select a volume you want to create a snapshot of.
Click Create snapshot.
In the window that opens, you can set the Name tag and snapshot description.
If you need to set additional tags, go to the next step by clicking Add tags. Specify the tag key and value.
After setting all the required parameters, click Create.
Snapshot is created in two steps. At the first step, a snapshot of the volume state is created. This is a sub-second operation, which does not block volume reads/writes.
At the second step, the snapshot content is transferred to object storage. It can take a long time depending on the amount of data; meanwhile, the volume snapshot will be in the Creating state. The volume can be attached, detached, or deleted without waiting for this step to complete. You can only create another snapshot of the same volume after the snapshot has been fully transferred to the object storage and the snapshot state has changed to Completed. You can monitor the progress on the volume snapshot page.
Important
For all company projects and users, you can simultaneously create a maximum of 16 volume snapshots.
Important
To ensure volume snapshot consistency of a volume attached to a running instance, stop the instance or flush the cache and suspend writing to the volume.
Create a volume version#
To save the volume content at a certain point in time and then quickly restore it, you can create a volume version, which creates a volume snapshot. However, the snapshot content is not sent to another storage, so the version is created in a fraction of a second.
To create a volume version:
Go to the Virtual machines section Compute Instances.
Find the instance in the resource table and click the instance ID to go to its page.
In the Volumes tab, select a volume you want to create a version of.
Click Create version.
In the window that opens, you can set the Name tag.
If you need to set additional tags, go to the next step by clicking Add tags. Specify the tag key and value.
After setting all the required parameters, click Create.
You can also create a volume version in the Volumes subsection or on the volume page. Read the volume version documentation to learn more about volume versions, in particular how to restore a volume from an existing version.
Important
As with volume snapshots, to ensure version consistency of a volume attached to a running instance, stop the instance or flush the cache and suspend writing to the volume.
Configure volume to be deleted upon instance deletion#
You can modify the Delete with instance option value, which was specified for a particular volume when the instance was created.
Go to the Virtual machines section Compute Instances.
Find the instance in the resource table and click the instance ID to go to its page.
In the Volumes tab, find the required volume in the resource table and push the Delete with instance toggle to the desired position.
Note
If the toggle field is not visible, click and drag the Delete with instance block to Displayed columns.
Alarm setup#
С помощью алармов можно настроить выполнение заданного действия, когда метрики экземпляра выходят за заданные критические значения.
Create alarm#
Note
Alarm can also be created in the section Monitoring Alarms.
Go to the Virtual machines section Compute Instances.
Найдите нужный экземпляр в таблице ресурсов и нажмите на имя ресурса для перехода на его страницу.
Open the Alarms tab and click Create.
In the window that opens, select the metrics to be monitored:
CPUUtilization — Загрузка процессора за предопределённый интервал.
MemoryUtilization — Загрузка оперативной памяти за предопределённый интервал.
NetworkIn — Количество байт, полученных через все сетевые интерфейсы экземпляра, за предопределённый интервал.
NetworkOut — Количество байт, переданных через все сетевые интерфейсы экземпляра, за предопределённый интервал.
NetworkPacketsIn — Количество пакетов, полученных через все сетевые интерфейсы экземпляра, за предопределённый интервал.
NetworkPacketsOut — Количество пакетов, переданных через все сетевые интерфейсы экземпляра, за предопределённый интервал.
DiskReadBytes — Количество байт, считанных со всех дисков, присоединённых к экземпляру, за предопределённый интервал.
DiskWriteBytes — Количество байт, записанных на все диски, присоединённые к экземпляру, за предопределённый интервал.
DiskReadOps — Количество операций чтения со всех дисков, присоединённых к экземпляру, за предопределённый интервал.
DiskWriteOps — Количество операций чтения со всех дисков, присоединённых к экземпляру, за предопределённый интервал.
Click Next.
Set alarm metrics (for details, see Alarms section):
the alarm name and, optionally, its description;
statistics;
the condition of triggering an alarm for the selected metric. It includes a comparison operator and a threshold value;
the number and duration of time periods, over which metric values are collected.
If necessary, you can also change the metric selected in the previous step.
Если вам не требуется настраивать действия по аларму, пропустите этот шаг. В противном случае нажмите Настроить действия. В качестве возможных действий вы можете задать отправку сообщения на электронную почту или выполнение политики для группы Auto Scaling.
Once you have made all the required adjustments, click Create.
Change the alarm#
Go to the Virtual machines section Compute Instances.
Найдите нужный экземпляр в таблице ресурсов и нажмите на имя ресурса для перехода на его страницу.
Open the Alarms tab, select the desired alarm in the table and click Modify.
The dialog window will open at the Parameters step. Modify the required alarm parameters:
description;
statistics;
monitored metrics;
the condition of triggering an alarm for the selected metric. It includes a comparison operator and a threshold value;
the number and duration of time periods, over which metric values are collected.
Если вам не требуется настраивать действия по аларму, пропустите этот шаг. В противном случае нажмите Настроить действия. В качестве возможных действий вы можете задать отправку сообщения на электронную почту или выполнение политики для группы Auto Scaling.
Once you have made the required changes, click Modify to save them.
Delete the alarm#
Go to the Virtual machines section Compute Instances.
Найдите нужный экземпляр в таблице ресурсов и нажмите на имя ресурса для перехода на его страницу.
Open the Alarms tab and select the alarm to be deleted in the alarm table. You can select multiple alarms at once.
Click Delete and confirm the action in the dialog window.
Instance information#
General information about instances can be viewed in the resource table in Virtual machines Compute Instances. To view a summary table of all instances in the project, select All VPCs in the VPC filter. To display instances from a particular VPC, select the desired VPC in the filter.
To go to the page of a particular instance, click its ID in the resource table in the Instances subsection. To facilitate the instance search, select its relevant VPC in the VPC filter or use the table search.
The Information tab provides the detailed information about the instance:
state;
instance name (Name tag);
instance image;
instance type;
SSH-key;
имя пользователя;
пароль;
DNS name;
availability zone;
placement group;
placement type;
dedicated host (only for instances running on dedicated hosts);
affinity with the host (only for instances running on dedicated hosts);
virtualization type;
VPC;
network interfaces;
security groups;
network the primary network interface is attached to;
Elastic IP;
Private IP;
boot device;
boot menu status;
user data.
Here you can:
change the instance name (Name tag);
The Volumes tab displays a table with information about volumes attached to the instance:
volume ID;
volume name;
state;
size;
volume type;
volume IOPS performance;
Delete with instance option value;
device type: boot or additional volume.
The sequence and scope of the displayed data may vary depending on the table settings.
Here, you can perform all basic operations and actions with volumes.
The Network and security tab contains a table with details of the network interfaces attached to the instance and security groups assigned to the network interfaces of the instance:
network interface ID;
network interface description;
subnet ID;
Elastic IP;
Private IP;
assigned security group IDs.
Here you can:
In the Metrics tab, you can view the graphs of the monitored metrics. You can set the period the metric graph covers, statistics, and metric calculation interval. To automatically refresh the graph, enable Auto-refresh; to refresh it manually, click Refresh.
Important
Automatic refresh is not possible when a custom period and/or interval is selected.
The Alarms tab displays details of alarms configured for the resource:
state;
alarm name;
triggering condition.
Alarms can be filtered by a state and/or metrics.
Here you can:
delete existing alarms with Delete button.
The Tags tab displays all tags assigned to the intance. You can add new, modify existing, and delete no-longer-needed tags.